
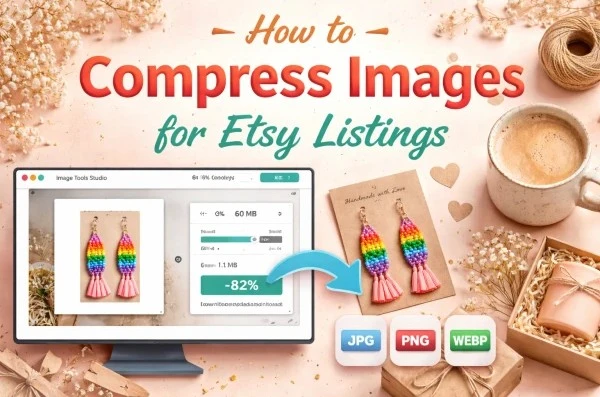
Etsy is visual. Your photos are your storefront.
The catch: most product photos straight from your phone or camera are way bigger than Etsy needs. That can make pages feel slower and hurt the shopping experience, especially on mobile.
This guide shows the simplest way to shrink file size while keeping images crisp using Image Tools Studio.
Quick Goal
- Sharp images that still look great when shoppers zoom in
- Smaller file sizes that load faster and feel more professional
- Repeatable workflow you can use for every listing in under a minute
Why Compression Matters for Etsy Sellers
Etsy will display your images at multiple sizes and process what you upload. But if your original uploads are huge, you are making Etsy do extra work and risking slower load times or inconsistent results.
- Fast-loading pages reduce friction, especially on mobile
- Smaller images upload faster and are easier to manage
- Better performance helps buyers stay focused on the product
Translation: faster listings usually convert better. Nobody buys from a page that feels sluggish.
Best Etsy Image Settings
| Setting | Recommended Target | Why It Works |
|---|---|---|
| Longest side | 2000px | Looks sharp and supports zoom without being massive |
| Format | JPG recommended | Best balance of quality and smaller file size |
| Compression | Leave at default | Optimized for sharpness and performance |
| File size target | < 1MB | Fast loading while keeping detail |
Step-by-Step: Compress Images for Etsy Using Image Tools Studio
- Select the Etsy Listing preset, such as 2000x1500.
- Enable Fill mode so the product fills the frame.
- Leave compression at the default setting.
- Convert to JPG for best marketplace compatibility.
- Download and upload to Etsy.
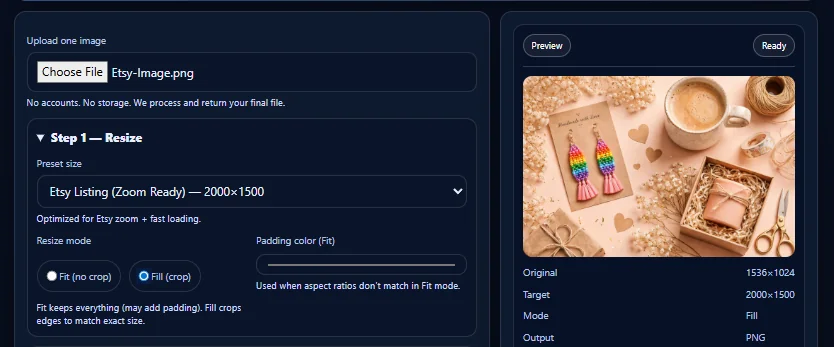
Step 1: Resize to the Etsy preset and enable Fill mode.
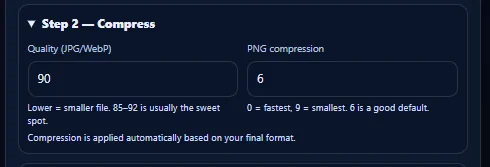
Step 2: Leave compression at default.
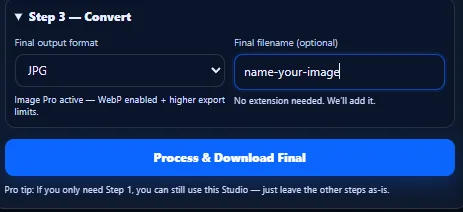
Step 3: Convert to JPG for Etsy listings.
Common Etsy Photo Mistakes
- Compressing before resizing
- Not using Fill mode, which can leave empty bars and reduce visual impact
- Uploading images that are too small
- Over-adjusting compression sliders
- Using PNG for everything when JPG would be lighter
Try Image Tools Studio
Use Image Tools Studio to resize, compress, and convert images in one workflow: Open Image Tools Studio.
What Makes This Workflow Different
- No accounts
- No subscriptions
- Fast, repeatable results
- Resize, compress, and convert in one place
FAQ: Etsy Image Compression
What dimensions are best for Etsy listing photos?
2000px on the longest side is a strong balance of clarity and performance.
What file size should I aim for?
Under 1MB while remaining sharp.
Why do my images look blurry?
Usually resizing too small, over-compressing, or not cropping correctly.
Is WebP okay for Etsy?
Yes, but JPG remains the safest default for product photography.